Building a chatbot can significantly improve user interaction and provide automated support for your application. In this step-by-step guide, we’ll walk you through creating a powerful chatbot using React, Node.js, and OpenAI. Explore how to integrate these technologies to build a responsive, intelligent chatbot that can understand and respond to user queries. Whether you’re a developer looking to improve your skills or a business aiming to enhance user experience. help you create an efficient and engaging chatbot.
How To Design Chatbot Responses and Conversation Flow
Designing chatbot responses and conversation flow is crucial for creating a seamless and engaging user experience. It involves defining how the bot will interact with users, understand their intent, and provide relevant responses. A well-structured conversation flow ensures the chatbot remains efficient and user-friendly while adapting to different user queries. By planning your responses carefully, you can guide the user through the conversation effectively, making interactions smooth and informative.
Key Points:
- Understand User Intent: Identify the most common queries and design responses accordingly.
- Use Clear and Simple Language: Ensure that responses are easy to understand and follow.
- Maintain Context: Design the flow to remember user input and keep conversations coherent.
- Offer Choices: Provide users with multiple options to guide the conversation and make it interactive.
The requirements:
It is very important to make sure that you have the following before you start:
⦁ Basic knowledge of JavaScript and experience with React and Node.js.
⦁ Node.js installed on your machine.
⦁ An account with OpenAI and access to their API.
⦁ Basic knowledge of JavaScript and experience with React and Node.js.
⦁ Node.js installed on your machine.
⦁ An account with OpenAI and access to their API.
Now post ensuring the availability of above-mentioned items, begin with below steps:
Step 1: Using Node.js to Set Up Your Backend
Initialize Node.js project
Make a new project directory and launch a Node.js application:

Install dependencies
You’ll need “express” for creating the server and “axios” for making HTTP requests to the OpenAI API. You can replace “express” with server of your choice. Instead of “axios” you can use the built-in “fetch” for making HTTP requests

Set up Express server
Create a file named server.js and initialize an express app. The express app will be listening on PORT 5000.

Integrate OpenAI API
Add a route to handle POST requests from our React application that will interact with OpenAI. This POST request will contain user message in the body.

Step 2: Using React to Set Up Your Frontend
Initialize a Vite project
Create a new directory for your project and initialize a React application:

Build Chat Interface
Create a simple chat interface in your App component. We are using “messages” state to manage our array of chat messages.

Implementing handleSendClick
We send an HTTP request to the express backend when a user types a message in the input field and clicks the send button. We will display the OpenAI message, or, in the event of an error, an error message based on the response.
Here is how we are monitoring the “loading” state:

The assistant message will be empty when the user clicks the send button while an HTTP request is still being processed.

Improve User Experience
Scrolling to the end of messages
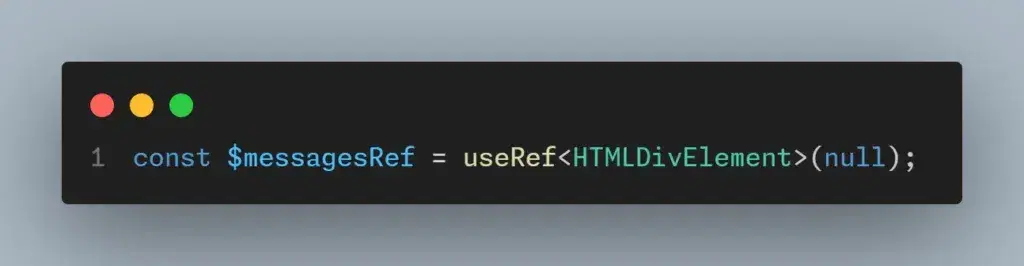
To scroll to the end of messages when a user clicks on the send button, we will create an empty div element and attach a ref to it.
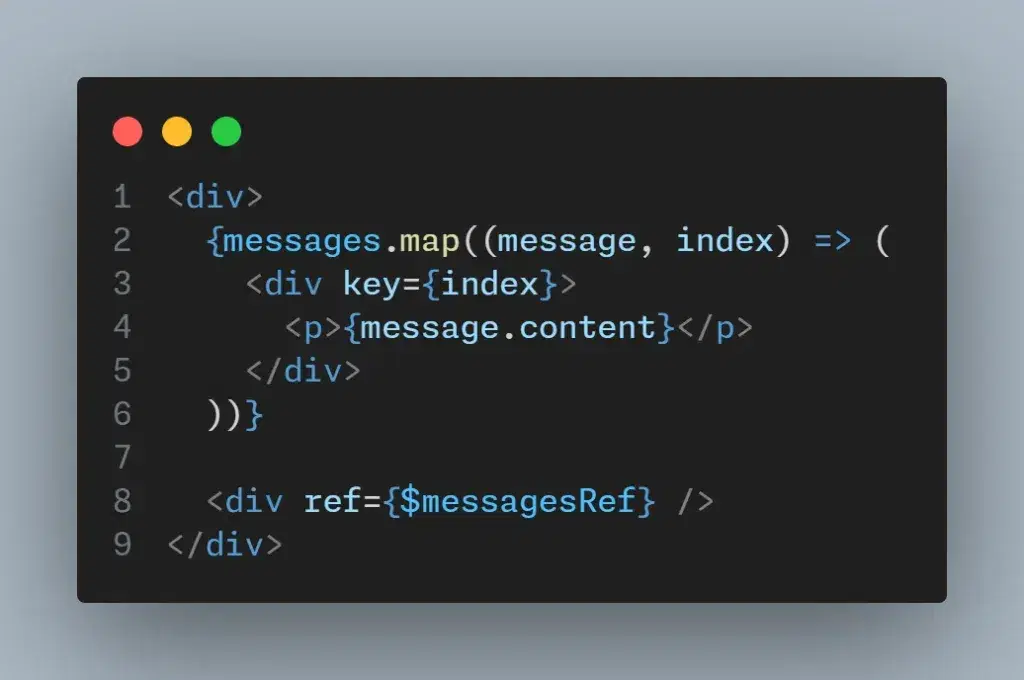
Now, when a user clicks on the send button, we will scroll to the anchor element.

Preventing scroll to bottom if user scrolls up after sending message
Create another ref to check whether anchor element is in viewport. If it’s not in viewport, that means user has scrolled up and hence we will not scroll down.


Add a scroll handler to div wrapping messages.

Key Takeaways:
- Required Skills and Setup: Before building the chatbot, ensure you have basic knowledge of JavaScript, React, and Node.js, along with access to OpenAI’s API.
- Backend with Node.js: Use Node.js and Express to create a backend server that interacts with OpenAI’s API, handling user input and providing responses.
- Frontend with React: Build a simple and interactive chat interface using React, manage chat messages with state, and handle HTTP requests to the backend.
- User Experience Enhancements: Improve user experience by handling message scrolling and preventing unnecessary auto-scrolling when the user manually scrolls.
- Designing Chatbot Responses: Focus on understanding user intent, using clear language, maintaining conversation context, and offering options to keep the chat engaging and interactive.
Conclusion
In this blog we discussed building a chatbot with React, Node.js, and OpenAI. Hope this step-by-step guide was helpful to you. Are you curious to know more about AI tools and technologies? Our next blog from this series will provide you with interesting and useful information by guiding on improving Flolite with an AI-Powered Chatbot. Click here to increase your knowledge and tech expertise.